How To Build A Concrete Shed Base
Laying a base for your new shed isn’t the most complicated of tasks, but care needs to be taken during the process in order to maintain the long term stability, safety and reliability of the project. In this piece, the team at Neil Sullivan & Sons are going to run through the steps of laying a concrete shed base.
Location is key
The ground where you’ll be laying the base for your shed is very important. Think about accessing your shed, and what you’ll be using it for. If you’ll be using it for storing bulky items like bikes, for example, then you’ll need enough space to actually bring them to the shed in the first place. Try and leave at least a metre between your shed and any fences or walls – this not only makes access easier and allows you space to paint/maintain the shed, it also allows it to ‘breathe’, which reduces the risk of damp and rot.

Level your site
Flat ground makes for an easier process. If you’re trying to lay a shed base on bumpy or uneven ground, this can create problems in both the short and long term. The immediate problem is the increased difficulty of the task, but the long term problems include a lack of proper support for the shed, and damage to the structural integrity of the shed over time, which can easily be exacerbated. The wood can bend and warp with changes in humidity or temperature, and this can lead to windows and doors not shutting properly, too.

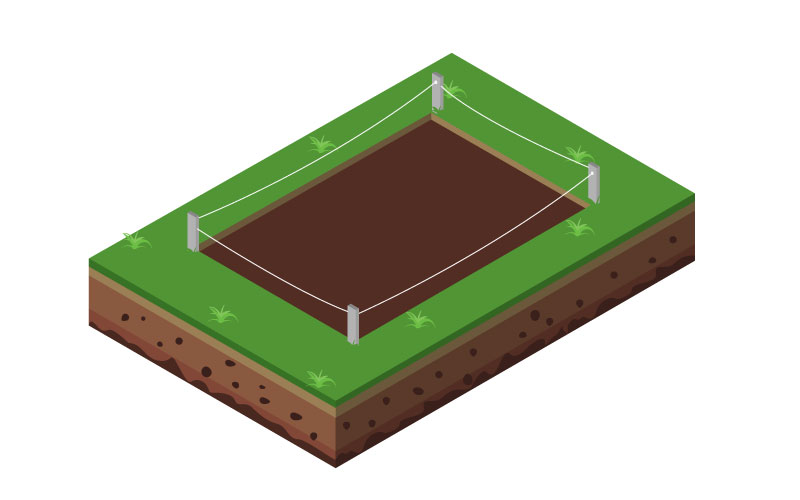
Mark out the area
Be sure to measure out the proposed area for your shed base before getting to work. It’s advisable to mark out an area that’s slightly larger than your shed will be – approx 30-40mm extra space on each side. Remove all vegetation and turf from the marked area and then dig out the topsoil at a depth of at least 150mm – this allows for 75mm for hardcore and 75mm of concrete.
Once the area has been defined, remove the strings but leave the pegs in place. Be sure to rake the earth and compact it once the hardcore has been added.
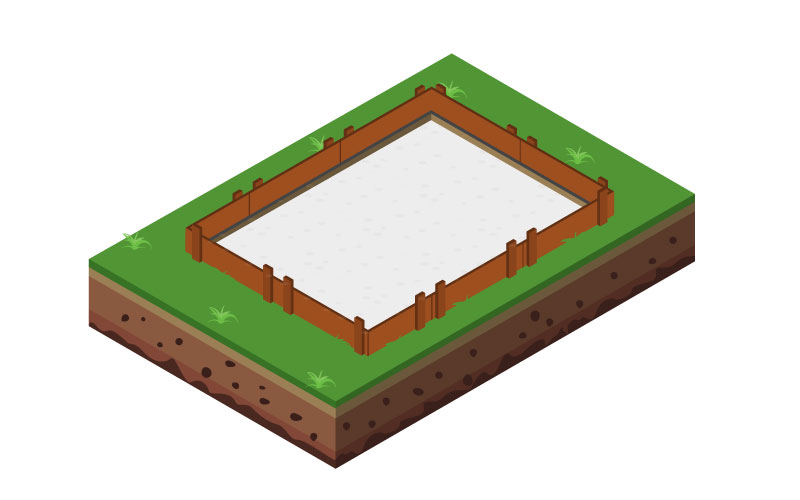
Framing
In order to ensure the concrete maintains its shape while it sets, a frame is required. Timber is the best material for the job. Once the frame has been made and you’re sure the inside measurements match the base dimensions, use a spirit level to check that it is level, add some extra pegs at 600mm intervals for additional security. The pegs should be below the top level of the frame for ease of levelling off the concrete.
Pour the concrete
The next step is the concrete itself. Whether you’ve opted for ready mixed concrete from a concrete company or you’re creating the mix yourself, it’s important that you pour it into place carefully. Pour the concrete by layers, making sure it reaches the corners and edges of the frame, then spread and compact it with a compacting tool. When the concrete has been poured in, tap the edges of the frame with a hammer to remove air bubbles, then continue to pour until the concrete is just overflowing the top of the frame.
Once all of the concrete has been poured, it’s time to level it off using a length of timber. Work from one end to another, scraping off excess concrete – this will leave a smooth top that is flush with the top of the frame. Once you’ve finished the pour, it’s time to let the concrete set. Leave it for at least three days before removing the frame, covering with plastic sheeting if it rains. If it’s warm outside, spray the concrete with water and cover it with a damp cloth to prevent it from drying too quickly.
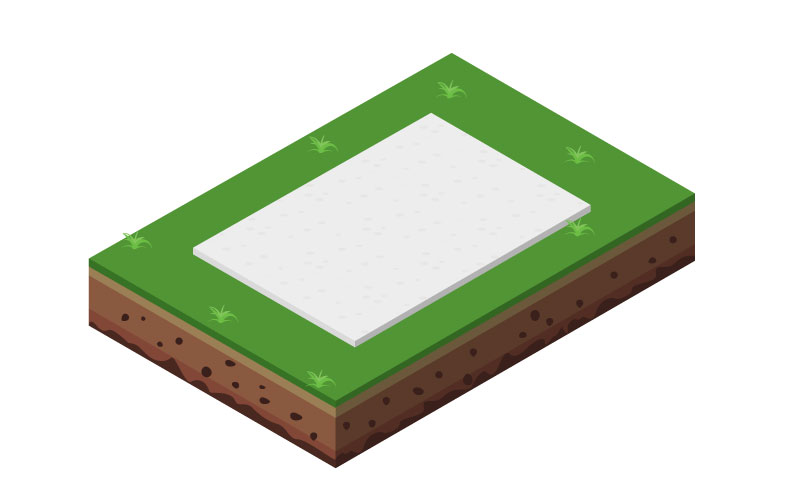
When the concrete is set completely, you can remove the frames and then begin work constructing your shed. If you’ve followed the above steps and taken the appropriate care, then you can place total faith in your concrete base.
Neil Sullivan & Sons are one of the Essex region’s leading providers of high quality concrete for the domestic and commercial markets. With prompt service, the finest materials and trained, knowledgeable staff, we’re the first port of call for all your concrete needs. For more information, please contact us today and we’ll be more than happy to help.